By the Exhibition Stall Design editorial team · Updated 1 October 2026 · 14 min read
Short answer
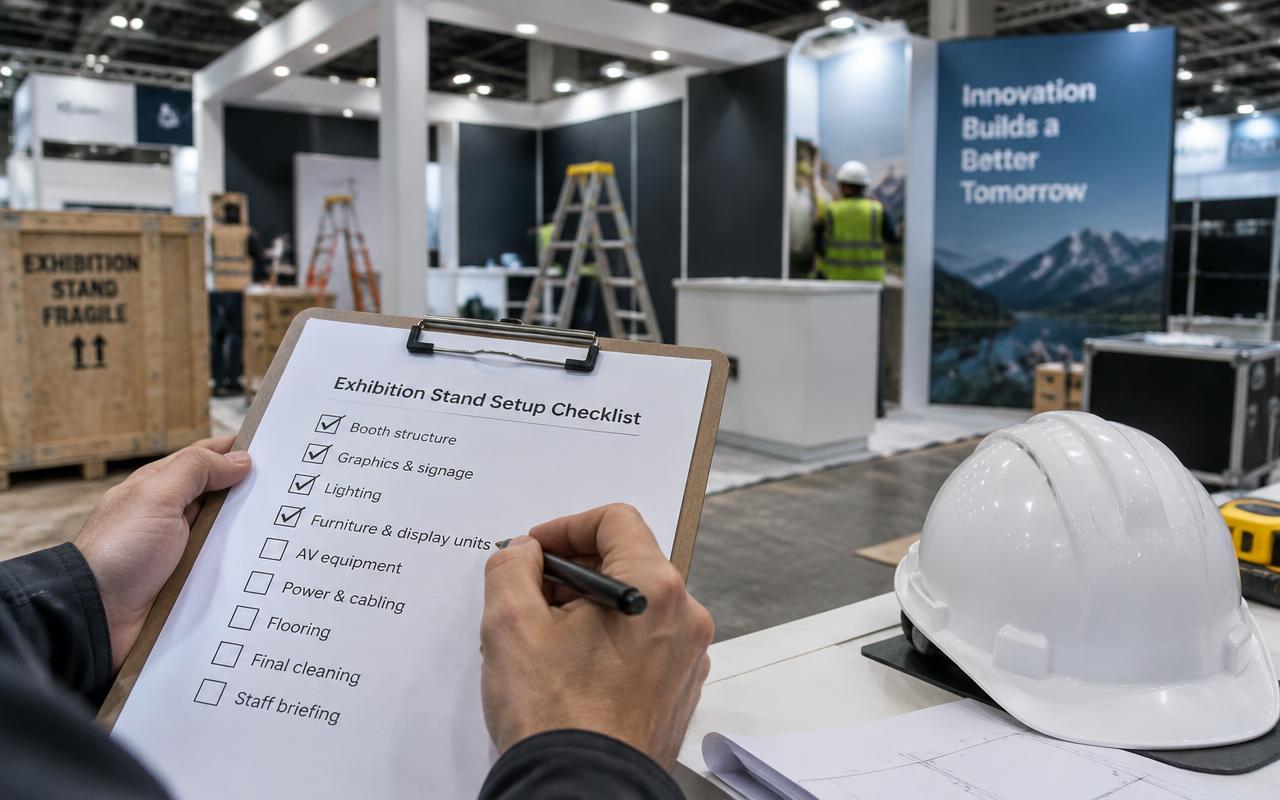
An exhibition stand builders checklist works backwards from show day in seven phases: brief and budget, design sign-off, approvals and pre-production, pre-dispatch inspection, build-up, show days, dismantle. Each phase has a condition that must be true before the next begins — constraints written down, one approved version with a finish schedule behind it, stamped drawings and final artwork, a snag list closed in the workshop, a signed handover, a daily open-of-day check, and a clearance plan agreed before build-up. Give every item a date and a name, and review one shared copy weekly.
Key takeaways
- Every item needs a date and a name against it. An unowned item is an item nobody is doing.
- Confirm transport passes, unloading slots and build-up access hours in writing; venue rules decide your real working time.
- Refuse to start a phase until the one before it has genuinely closed. Early starts cause rework, not speed.
- Approve materials and finish codes, not only renders — "as per design" is not something a workshop can cut to.
- The pre-dispatch inspection is the last cheap place to fix anything. Once the truck leaves, every fix is a site fix.
- Seven phases, in order: brief, design sign-off, approvals and pre-production, pre-dispatch, build-up, show days, dismantle.
How to use this exhibition stand builders checklist
Our build crews handle build-up, organiser coordination, electrical, and dismantling so you arrive to a finished stand.
Lists of nouns do not survive a busy fortnight. "Artwork" gets ticked as soon as somebody has emailed about artwork; "artwork at final size, with bleed, approved on the real substrate" cannot be ticked until it is true. Every item here carries the thing that goes wrong when it is skipped, because that is the only part of a checklist anybody reads twice.
Work the phases in order, and do not let enthusiasm start one early. A stand that is late almost never got slow in the workshop — it got started twice, because the phase it depended on had not actually closed when the next one began.
It is the same list whether you are exhibitors, procurement teams and agencies who need a stall built on time, to drawing, and safely at the venue or running your first show. What changes is who owns it. Pick one person on your side with the authority to decide, pair them with one named project manager on the build side, and keep one copy rather than two.
01
Phase 1 — Brief, area and budget
Closes when the show, hall, stand number, area, open sides, height limit, budget band and the single visitor action you are designing for are all written down in one place. Nothing should be designed before that is true, because every later decision inherits this one.
02
Phase 2 — Approve the design properly
Done when there is a version number everybody is agreeing to, a finish schedule standing behind the render, and no stakeholder left who has not yet seen it.
03
Phase 3 — Approvals, artwork and release
Finished when nothing downstream is waiting on a piece of paper. Stamped drawings, certificates, final artwork and a signed scope — all four, or production has not really been released.
04
Phase 4 — The pre-dispatch check
Finished when the snag list is closed and re-walked, the load is labelled against the drawing, and the spares are packed on purpose rather than from memory.
05
Phase 5 — Build-up at the venue
Ends at a signed handover, not at the moment the last panel goes up. Power on, lights aimed, floor clean, snags agreed, and somebody named as responsible from that point onward.
06
Phase 6 — Every show morning
A daily loop rather than a milestone. The same few checks every morning, because the things that break are the things that were working perfectly yesterday.
07
Phase 7 — Strike and the week after
The phase everybody stops managing, which is exactly why deposits are lost and leads go cold. It closes on paper: clearance confirmed, inventory listed, follow-up done.
Who is accountable for what, and by when
Almost every late stand has a stage in it that two people each believed the other was handling. The fix is unglamorous: name one party per line, and express the deadline in weeks before the show rather than as a date, so the schedule survives the show being moved.
Read the last column first. A stage with nothing downstream of it can slip a few days without damage. A stage that blocks three others cannot slip at all. Organiser approval and print-ready artwork block the most, which is exactly why they sit earlier in the schedule than most exhibitors expect them to.
| Stage | Who owns it | Due before show | What it blocks |
|---|---|---|---|
| Concept and layout approval | Exhibitor, plus every internal sign-off holder | 5 weeks | 3D visualisation, costing and the drawing set |
| Materials, finishes and lighting schedule | Designer, with the exhibitor | 5 weeks | Procurement and the workshop cut list |
| Itemised scope frozen and signed line by line | Project manager, exhibitor counter-signs | 5 weeks | Every later argument on site about what was included |
| Organiser drawing submission and stamped approval | Project manager, exhibitor counter-signs | 4 weeks | Production release, rigging, height and any raised structure |
| Print-ready artwork at final size | Exhibitor brand team | 3 weeks | Every printed surface, which is most of what a visitor sees |
| Production release to the workshop | Project manager | 3 weeks | Fabrication, finishing and the pre-dispatch date |
| Long-lead items ordered: screens, specialist lighting, imports | Project manager | 3 weeks | The build itself, if the stock is committed elsewhere |
| Furniture, AV, flooring and plants confirmed | Project manager | 2 weeks | Delivery slots, which are allocated in the order they are requested |
| Pre-dispatch inspection and snag closure | Workshop QC, exhibitor on a video call | 10 days | Dispatch — nothing loads with snags still open |
| Transport, vehicle passes and unloading slot | Project manager | 7 days | Arrival time, and therefore your real build hours |
| Handover inspection, signed | Project manager and exhibitor together | Show day −1 | Your right to have snags fixed before doors open |
| Dismantle, clearance and deposit release | Project manager | Agreed before build-up | Return of reusable elements, and your deposit |
Treat the deadlines as a baseline for a mid-size standard-finish build. Our planner's formula gives you your own: 3 weeks to start with, a week more from 24 sq.m, two more from 54 sq.m, two more again for premium finishes and two for a double-decker. Whatever that adds, add it to every row here.
Phase 1 — constraints before concepts
Nothing later can repair a vague brief; it can only work around it. What belongs here is not taste but limits — how much floor, how many open sides, how high, how many hours of access, how much money, and what the stand has to make a visitor do.
Before anything is drawn, agree what good looks like: a stall layout with a clear entry, a working demo counter, storage that keeps the floor clean, and a closed meeting area for serious buyers. That single line settles a surprising number of later arguments, because most design disagreements are actually unstated disagreements about what the stand is for.
- One named owner for this checklist on your side, with the authority to decide rather than only to report
- Show name, city, venue, hall and stand number — crews have arrived at the right venue and the wrong hall, and an hour lost at two in the morning is an hour off your finishing time
- Who will physically staff the stand, and whether they are free every show day — a roster agreed in week one avoids a stand run by whoever happened to be available
- Who can say no, and by when — a stakeholder discovered in week four causes a redesign, while the same stakeholder listed in week one causes a review
- The single visitor action that matters most: a demo, a meeting, a sample or a signature — stands designed around three competing actions deliver none of them well
- Brand assets at print resolution, with logo variants and Pantone or CMYK references — a low-resolution logo pulled off a website is the most common reprint there is
- Stall area in square metres and the number of open sides — three open sides means three finished faces, three lighting runs and more staff than an inline stand of identical area
- Build-up, show and dismantle dates with the access hours attached — your usable build time is set by the organiser, not by your plan, and night-shift labour is priced differently
Phase 2 — signing off the design properly
"Approved" usually means somebody liked the render. That is half a sign-off. The other half asks whether it can be fabricated at the quoted price, powered within the declared load, moved through the hall's doors, and stamped by the organiser — and that half is what protects the schedule.
Changes at this stage are free. Changes after production release are paid for in material, labour and time. Changes during build-up are paid for at night-shift rates using whatever material happens to be in the van. The entire value of this phase is that it is the last moment where "actually, can we move the counter" costs nothing at all.
- Eye-level views from the aisle, not only a flattering raised corner render — you should be approving what a visitor will actually see when they walk past
- Weight and fixing method for anything hung, shelved or cantilevered, agreed before it is drawn rather than after it is built
- Sightlines tested from the two or three aisles that actually feed your stand, rather than from the one the render was drawn in
- A dimensioned, version-numbered drawing set issued to everyone who needs it, so the site crew is not working from three different files with the same name
- Materials and finishes named with codes: laminate, veneer, paint, acrylic, fabric, metal. A finish schedule is what stops the built stand drifting from the approved visual
- Visitor circulation checked on the plan: where somebody enters without committing, where they stop, and where your team stands without blocking the entrance
- Electrical load added up circuit by circuit and declared to the organiser, with the point of supply located on the plan
- A meeting area decided deliberately rather than by accident — 5% of the area by default, and more only if you are actually hosting meetings, because a meeting corner added after sign-off comes straight out of display space
Changes are free until production is released. After that, every change is bought twice.
Phase 3 — the queues that decide your date
This is the phase where timelines actually die, and they die quietly, because waiting does not feel like a problem until the week it becomes one. Organiser approval and print-ready artwork have the longest queues behind them, and both are usually owned by somebody who has not been told they are standing on the critical path.
Organiser rules are constraints, not paperwork. They decide how high you may build, what may be hung, what may be brought into the hall and when it must leave — and a rejected submission does not cost a conversation, it costs a working week.
- Payment milestones aligned to the production schedule, so finished work is never held at a workshop over an invoice during the last fortnight
- Proofs approved on the real substrate for anything backlit, fabric or acrylic, because colour shifts between paper, fabric and a lit panel
- Power, water, compressed air and internet ordered from the organiser inside their deadline, while the published rate still applies
- Drawings submitted in the organiser's required format, and the stamped approval received back — a submission is not an approval, and the gap between them is a queue you share with the whole hall
- Insurance and public liability cover in place for the build crew and the show days, in the name the organiser asks for
- The written scope frozen and signed line by line, so that what the workshop builds and what you believe you ordered are demonstrably the same list
- Lead capture chosen and tested now rather than in the taxi to the venue, with somebody named to export the data each evening
- A structural engineer's certificate wherever there is a double-decker, a hanging structure, a staircase or a raised platform that carries people
Exhibition Stand Builders scope: the lines that must be in your order
An order is a list, not a number. Written as a list it tells you what you are getting; written as a total it tells you only what you are paying, and leaves both double-counting and outright gaps invisible until somebody is standing in a hall.
Start with what this service is meant to include, then add the lines most often left out of a quote entirely. Transport, installation, dismantle and taxes are not small, and they are the usual explanation when one quote comes in dramatically below the others.
- Dedicated project manager — check it against the venue's rules on height, load and fire rating before it is produced rather than after it is standing in the hall
- Night-shift build-up crews — ask what happens if it fails on day one — whether a spare exists, and who is carrying it
- Electrical and safety compliance — confirm it is priced inside the figure you are comparing, rather than noted as available on request
- Same-day dismantle and clearance — name it in the order with a quantity against it, not only in the render — line items are what site crews work from, and renders are not contractual
- Storage of reusable elements between shows, and who pays for it
- Dismantle and clearance inside the organiser's window, including removal of waste from the hall
- Electrical fittings, distribution and the labour to connect them, which are frequently a separate trade and a separate bill
- Installation, supervision and the crew size that will genuinely be on site, not a nominal figure
- Transport to the venue and back, with the vehicle type and the number of trips stated
Exhibiting soon? Let's build your stall.
Phase 4 — before anything is loaded
Nothing should leave the workshop that has not been stood up in the workshop. A full pre-build, or at minimum a part-assembly of the walls, counters and graphic frames, is where a laminate from the wrong batch, a panel cut twenty millimetres short, a door that fouls a counter or a graphic printed to superseded artwork becomes visible while a fitter, a saw and a spare sheet are still ten steps away.
Use one question as the gate: is this good enough to show a customer today? Not good enough to finish on site, not good enough with a bit of touching up — good enough now. Anything less and the load stays where it is, because site time is the most expensive time there is.
- Photographed from every side and shared with you for written approval — you do not have to be in the workshop, but you do have to see it
- Crew travel, accommodation and site passes booked — a crew that reaches the venue without a pass is a crew standing outside your hall
- Every crate and panel labelled against the drawing, with a loading list signed by the person who physically loaded it
- The load secured and sheeted for the actual journey, since a scratched laminate costs far more to repair on site than it did to make
- Graphics checked against the final approved artwork file, not against the version that was approved three revisions ago
- Screens and AV tested with your actual content at the actual resolution, not with a manufacturer's test pattern
- Assembled or part-assembled in the workshop with graphics mounted, so alignment problems surface before dispatch rather than at midnight in a hall
- Fixings, spare laminate, touch-up paint, spare lamps, cable and tools packed deliberately rather than remembered at the last minute
Phase 5 — build-up at the venue
On site you are not building, you are assembling against a clock somebody else set. Flooring before joinery, joinery before graphics, electrical before anything is closed up, cleaning last. Every inversion of that order costs an hour you did not have, and the hours are finite because the hall shuts.
Read the right-hand column as a list of the ways build-up normally fails. Every one of them is the result of a step taken out of turn rather than a step done badly, which is why the sequence is worth printing and taping up somewhere.
| Stage on site | Finished before the next stage starts | What goes wrong otherwise |
|---|---|---|
| Arrival and marking out | Stand position chalked against the organiser's floor plan, power point located | A stand built in the wrong place, or built over the only socket in the plot |
| Platform and flooring | Raised floor laid, cables run and hidden, edges finished | Trunking crossing the aisle — a trip hazard and a venue objection |
| Storage and back-of-house | Lockable store fitted out, stock placed, door clearances checked | Cartons stacked in the display area, in full view of buyers |
| Graphics and finishing | Panels fitted, fascia name checked letter by letter, touch-ups done | A spelling mistake on the fascia, reproduced in every photograph |
| Furniture and plant delivery | Hired items checked in against the order and signed for | A missing counter discovered on the morning of day one |
| Handover | Walkthrough with the exhibitor, signed off, spares and keys handed over | Nobody accountable for the stand at the moment it starts working |
Finish a day early on purpose. The last day of build-up is the only slack the project has, and spending it on contingency rather than on construction is the difference between a calm opening and a visible one.
Phase 6 — the daily show-day list
A show runs on a short list repeated daily. The temptation after a hard build-up is to stop managing and start selling, which is how stands arrive at day three with two lamps out, an empty brochure stand, a screen frozen on a dialog box and a lead form nobody has emptied since the first afternoon.
Staffing follows the same arithmetic as the stall plan: roughly one person for every 9 sq.m of area, minimum two. A 36 sq.m stand therefore needs about 4 people on the floor and a 72 sq.m stand about 8. Understaffed stands lose the visitor who was ready to talk; overstaffed stands intimidate the visitor who was only browsing, and both failures look identical in the lead count.
- Somebody counting conversations, qualified leads and meetings each day, so the show can afterwards be judged against something
- The stand cleaned and reset every morning — fingerprints on an acrylic panel are visible from the aisle and read as neglect
- Meetings booked into slots rather than taken as they arrive, so the stand is never blocked by one long conversation
- Lead capture tested on the first scan of each day, and the day's leads exported and backed up each evening — a device that fails quietly costs you a day of names
- A headline message legible from the aisle. If a passing visitor cannot tell what you sell in three seconds, the stand is not working however good the joinery is
- Phones charged and out of hands. Staff looking at phones is the most reliable way to make a busy stand look empty
- A spare of everything that can fail in public: lamp, remote, cable, demo unit, printed brochure
- Two or three agreed qualifying questions, so a thirty-second conversation separates a buyer from a bag collector without anybody being rude
Phase 7 — dismantle, and the week after
Dismantle is agreed before build-up or it is not really agreed at all. Organisers run a hard clearance deadline and charge for overstay, venues withhold deposits, and the crew who built your stand are by then building somebody else's in another hall. Decide in advance what is coming back, what is being scrapped, who is driving it and where it is going.
The week after the show is where the return on the whole exercise is won or lost. A stand that produced three hundred conversations and no follow-up is an expense rather than an investment, and the cost of that failure is larger than anything else on this page.
- A final walk of the empty plot with somebody from the venue, so damage is agreed on the spot rather than invoiced a month later
- A short post-show note on what to change: where visitors stopped, what they asked for that you did not have, and which element earned its cost
- Graphics kept flat and dry if the artwork will be reused, and scrapped deliberately if it will not
- Nothing valuable left on the stand during the final hour of the show, which is when halls are busiest and least supervised
- Dismantle slot, crew and vehicle booked before build-up begins, not negotiated during the last hour of the show
- Hired items returned and signed off, so rental days stop accruing on somebody else's ledger
- The space cleared inside the organiser's deadline, with the deposit release confirmed in writing rather than assumed
- Reusable elements — frames, graphics, counters, furniture, screens — inventoried and labelled as they come out, because unlabelled stock is stock you will rebuild next time
Where checklists usually fail
A checklist fails in one of three ways: nobody owns it, it lives in two places, or it is ticked optimistically. The third is the dangerous one. "Graphics are being printed" is not the same statement as "graphics are printed, proofed and crated", and the difference between them only becomes visible on the night of build-up.
The recurring problems on this kind of work are specific. Sub-contracted builds with no quality control, and non fire-retardant materials rejected at the venue. Neither is discovered by looking at a render; both are discovered by asking who does the work and where.
- Late arrival on site that eats into build-up time
- Hidden extras for electrical, carpet or dismantling
- Sub-contracted builds with no quality control
- Non fire-retardant materials rejected at the venue
- The exhibitor manual filed unread, which is where most of the week's surprises were written down in advance
- Progress measured by how much has been done rather than by what is now unblocked
- Verbal agreements with site crews that nobody carried back into the written scope
- Items ticked on intention rather than evidence — ask for a photograph, a certificate or a signed list instead of a reassurance
- One person holding every detail in their head, with no handover if they fall ill during show week
Next step: a checklist with your dates on it
Share your show name, city, dates, stall area, number of open sides and two or three reference images. That is enough for a concept, an itemised exhibition stand builders scope and a dated version of this checklist mapped to your show rather than to a generic calendar, usually within 48 hours.
One accountable project manager, in-house fabrication, organiser drawings and approvals handled, and 3D design included with every confirmed fabrication order. A checklist only works when somebody is paid to close it rather than asked to remember it.
Frequently asked questions
What paperwork should the site crew carry?+
The stamped organiser approval, fire-retardant certificates for every material, the structural certificate if there is a raised or two-storey element, vehicle and crew passes, the electrical load declaration and the signed loading list.
What is the item people most often miss?+
Print-ready artwork at final size. The printing itself is quick, but every printed surface waits behind final artwork, so a week lost there moves the whole production schedule and usually the dispatch date with it.
Is an exhibition stand builders checklist different for a small stand?+
The phases are identical; the number of items in each is smaller. What does not shrink is the approval and artwork work, which is why small stands run late for exactly the same reasons large ones do.
Who should own the checklist?+
One person on your side and one named project manager on the build side, reviewing a single shared copy every week. Two copies in two inboxes is functionally the same as no checklist at all.
Can you run this checklist for us?+
Yes. Every confirmed order gets a named project manager who owns the schedule, the organiser submissions, the pre-dispatch inspection, build-up, handover and dismantle, and who reports against this list weekly rather than when asked.
When should I start an exhibition stand builders checklist?+
Six to eight weeks before the show for a standard custom stall. 3 weeks is the production floor, and the brief, design and approval phases ahead of production need roughly as long again. Double-decker stands, pavilions and anything needing permissions should start earlier still.
What should be in the order besides the build?+
Transport both ways, installation and crew, dismantle and clearance, electrical fittings and the labour to connect them, and taxes — each on its own line. Those are the lines most often left out of a lump sum.
How long before doors open should the stand be finished?+
A full day, if the organiser's build-up window allows it. That day is your only buffer for a wrong panel, a failed driver or a late furniture delivery, and handing over the night before leaves you none.
Exhibition Stand Builders near you
Our crews deliver exhibition stand builders in every major Indian city.